¶ Scenarios
Scenarios are the phishing email templates sent to your targets. Each scenario defines the email content, format, and appearance that employees will receive during a campaign. Access this section from the left sidebar.
¶ Scenarios Overview
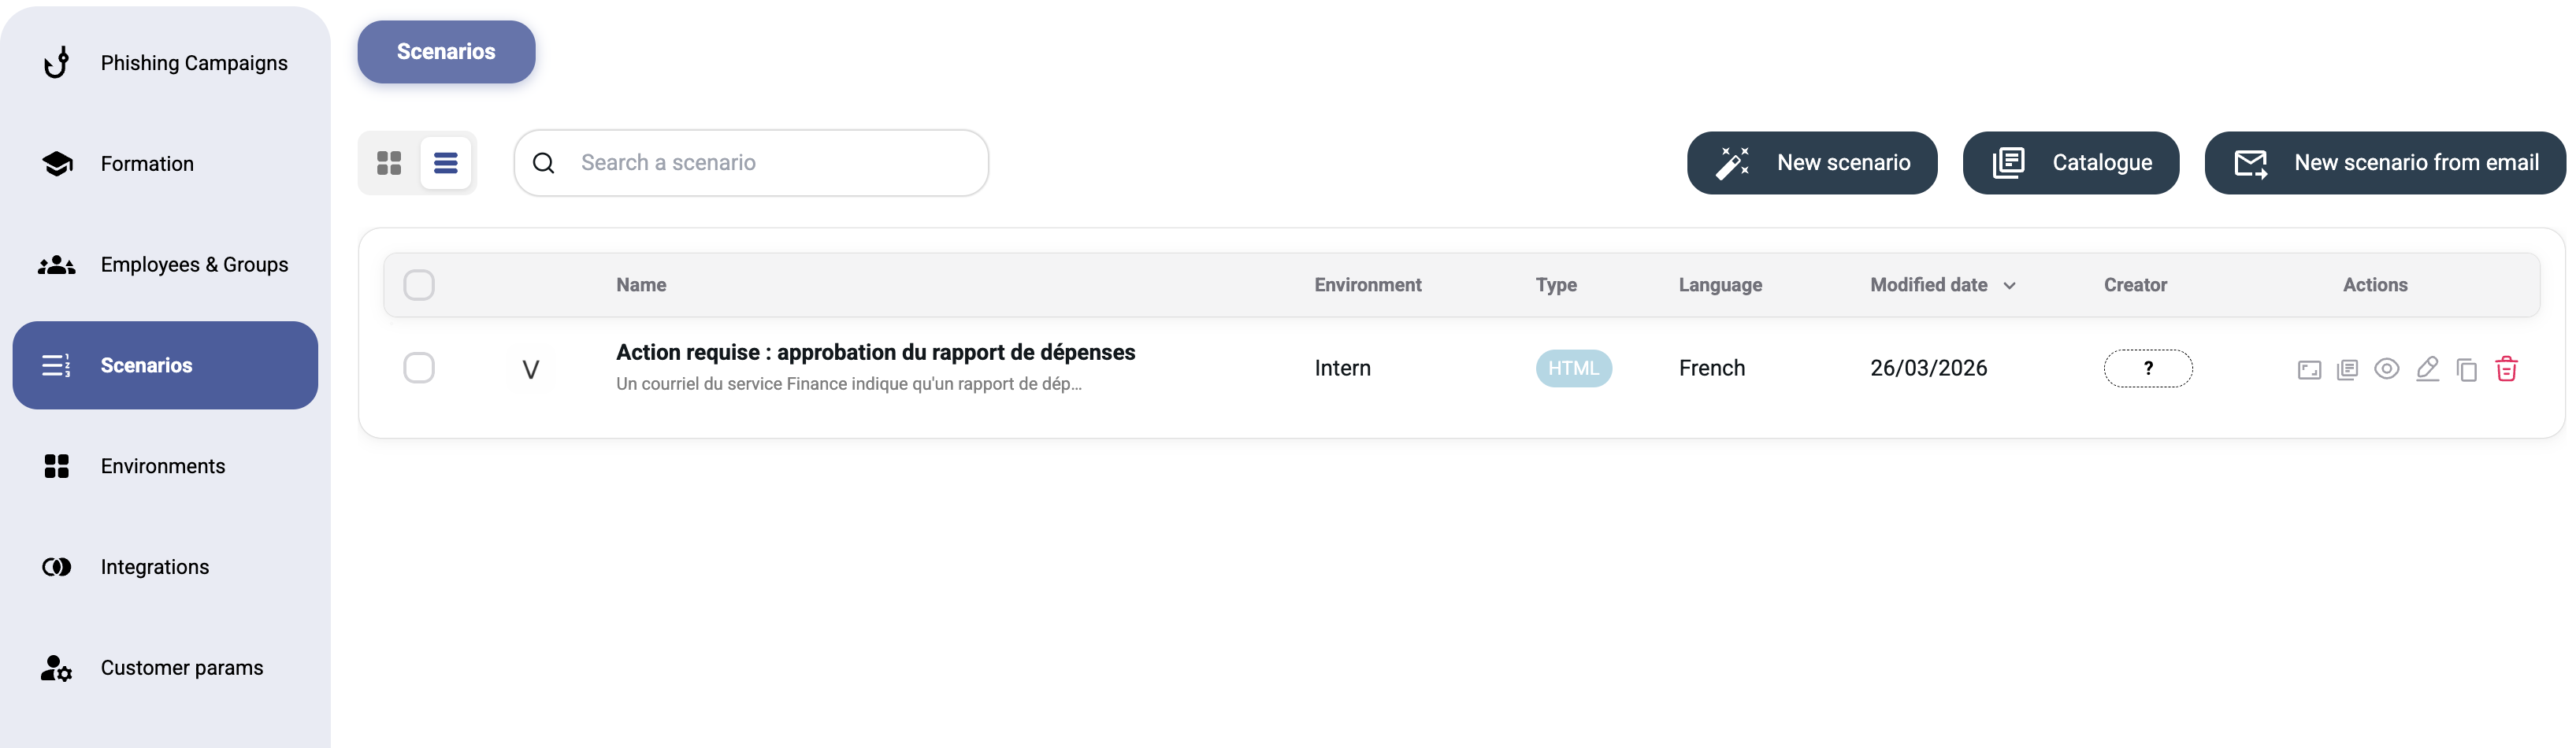
The Scenarios page shows all your email templates with options to:
- Search — filter scenarios by name
- Switch view — toggle between grid and list views
Three action buttons are available at the top:
| Button | Description |
|---|---|
| New scenario | Create a scenario from scratch (AI or manual) |
| Catalogue | Browse pre-built community scenarios |
| New scenario from email | Create a scenario by forwarding a real phishing email |
Note: If no scenarios exist, the page displays: "No scenarios: Please create a scenario"
¶ Creating a New Scenario
Click New scenario to open the creation dialog. You'll see two tabs:
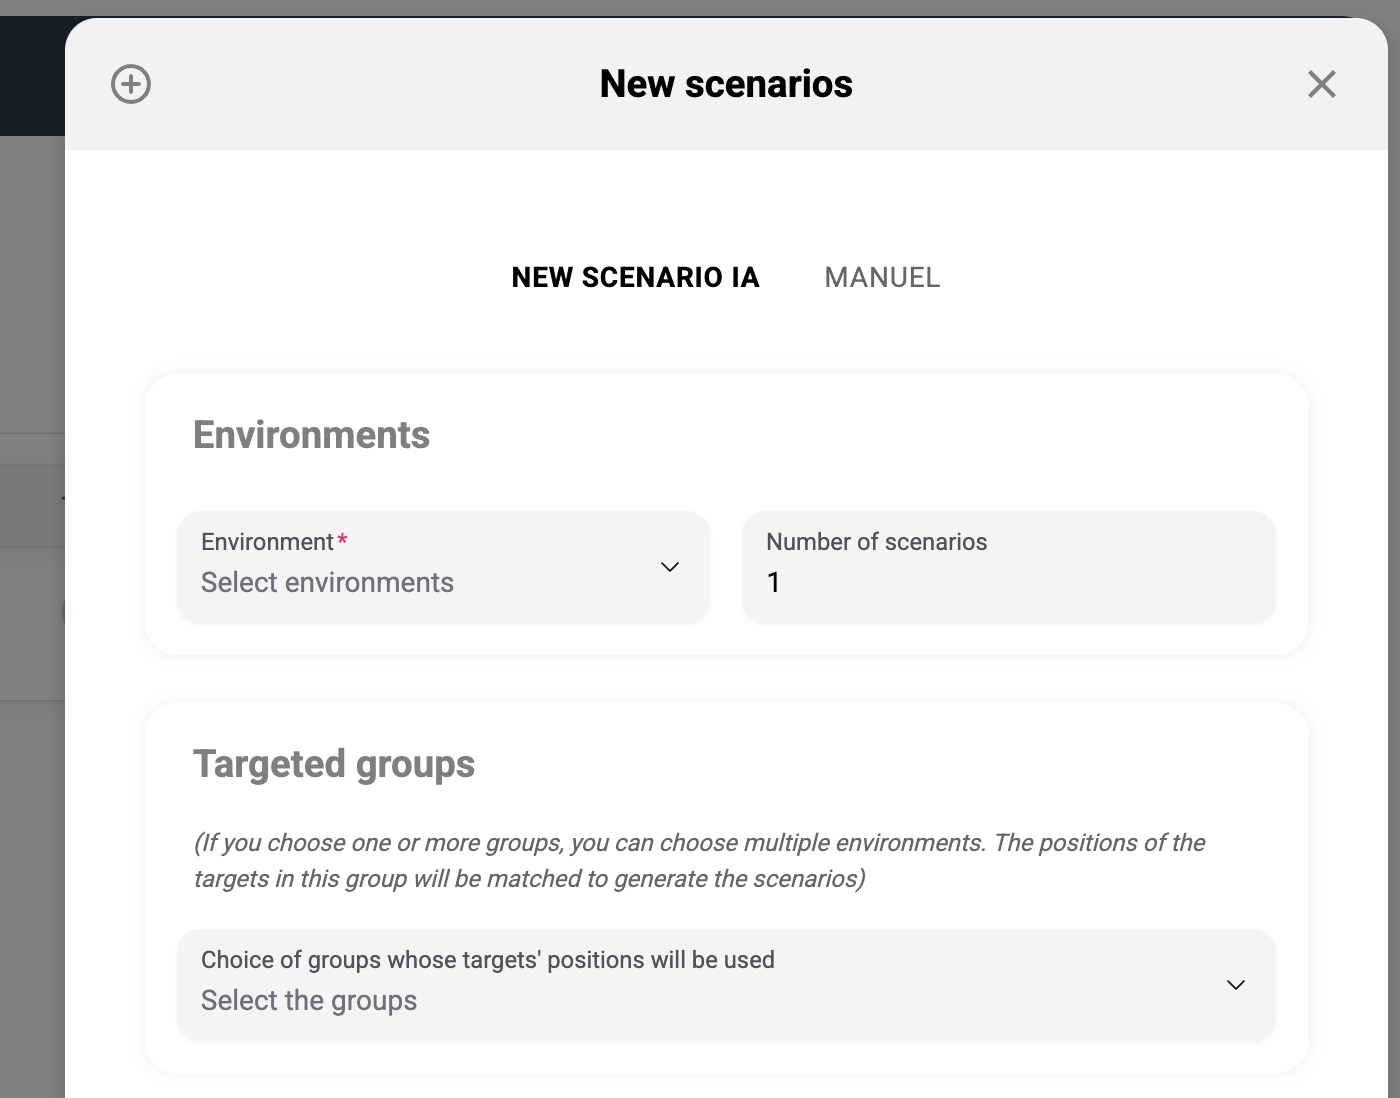
¶ New Scenario IA (AI-Generated)
The AI-powered mode generates realistic phishing emails automatically based on your environment configuration.
| Field | Required | Description |
|---|---|---|
| Environment | Yes | Select the environment (phishing theme/sender profile) to use |
| Number of scenarios | No | How many variations to generate (default: 1) |
| Targeted groups | No | Optionally target specific groups — the AI can personalize content |
| Format | Yes | Choose the output format |
¶ Format
Pick the output format for the generated scenario — see Scenario formats for the available options (Email MJML, Email HTML, SMS).
Tip: If you choose one or more groups, the AI can tailor the phishing email to the group's characteristics (department, role, etc.), making the simulation more realistic.
¶ Manuel (Manual)
The manual mode gives you full control over the email template. You write the HTML/content yourself using the built-in editor.
This mode is best for:
- Replicating a specific real-world phishing email
- Creating highly customized templates
- Testing a particular social engineering technique
¶ Scenario Catalogue
Click Catalogue to browse a library of pre-built phishing scenarios created by the community and team.
Features:
- Filter by environment — use the "My environments" filter to see scenarios compatible with your configured environments
- Preview — view how each scenario looks before using it
- One-click import — add any catalogue scenario to your account
Tip: Look for the "Verified" badge for quality-assured templates.
¶ New Scenario from Email
Click New scenario from email to create a scenario based on a real email.
This feature uses Forward Email — you forward an actual phishing email (or any email you want to simulate) to a designated address, and it is automatically converted into a reusable scenario template.
This is particularly useful for:
- Reproducing real phishing attacks your organization has received
- Training employees to recognize specific threats targeting your industry
- Quickly building a library of realistic scenarios
¶ Template Variables
When writing manual scenarios, you can use dynamic variables that are replaced with real data at send time. Common variables include:
| Variable | Description |
|---|---|
{{.FirstName}} |
Recipient's first name |
{{.LastName}} |
Recipient's last name |
{{.Email}} |
Recipient's email address |
{{.Position}} |
Recipient's job title |
{{.From}} |
Sender email address |
{{.URL}} |
Phishing landing page URL |
{{.TrackingURL}} |
Tracking pixel URL |
{{.Tracker}} |
Embedded tracking pixel <img> tag |
For the complete list, see Template Variables Reference.
¶ Best Practices
- Mix AI and manual scenarios — AI provides volume, manual provides precision
- Use the catalogue — don't reinvent the wheel; verified templates are battle-tested
- Rotate scenarios — don't reuse the same template; employees will learn to recognize it
- Match the environment — ensure your scenario content aligns with the sender identity (e.g., a Microsoft-themed email should come from a Microsoft-like environment)
- Increase difficulty gradually — start with obvious phishing, then progress to more sophisticated scenarios
- Test before sending — always preview your scenario and send a test email to yourself first
- Set up explanation emails — configure an explanation email for each scenario so targets receive awareness content after campaign completion. See Explanation Email
¶ Reusing and organizing scenarios
- Copy — duplicate an existing scenario to use it as a starting point.
- Tags & biases — organize scenarios with tags, and tag the psychological biases they exploit (authority, urgency…) to keep your program balanced.
- Library auto-sync — a scenario imported from the catalogue can stay auto-synced with the library, so updates to the source template flow into your copy. A badge shows the current sync status.
- Test send — send a scenario to yourself or a test group before using it in a campaign.
¶ Language and interaction triggers
- Language — every scenario has a language. You can keep several language versions of the same scenario so each target receives it in their own language (see also the auto-translate option).
- Difficulty level — scenarios carry a difficulty rating to help you balance easy and hard simulations.
- Interaction triggers — beyond a link click, a scenario can also count a reply (the target answers the email) or a forward as an interaction. These signals feed the campaign results.
- SMS scenarios — a scenario can be an SMS instead of an email, with its own message content (and an explanation SMS for the educational follow-up).
¶ Scenario formats
A scenario can be built in one of three formats, chosen when you create or edit it (this applies to every scenario, not only AI-generated ones):
- Email (MJML) — the recommended format. MJML is a markup language that compiles to email-safe, responsive HTML, so it renders reliably across email clients — including the heavy Outlook desktop client on Windows, which frequently breaks hand-written HTML emails. You build it visually with a drag-and-drop editor, no coding required.
- Email (HTML) — edit the raw HTML directly for full control. Best when you need pixel-level control, but you are responsible for cross-client compatibility (especially Outlook).
- SMS — a text message instead of an email.
¶ Templates inside a scenario
A scenario is a container for templates. Each scenario can hold:
- a phishing template — the simulation email or SMS sent to your targets;
- an explanation template — the educational message sent afterwards to explain the simulation (see Explanation email).
The same template can exist in several languages (see Translation below).
¶ Attachments
You can attach files to a scenario email (for example a fake invoice or document) with Attach file. Give each attachment a name and type.
For images, an image policy controls how they are delivered:
- CID (inline) — images are injected via their Content-ID and shown inside the email body.
- URL — images are sent as regular attachments, and image URLs in the HTML remain external links.
¶ Translation
A scenario can be delivered to each target in their own language.
- Translate — from a scenario, translate its template(s) into another language; the new language version is created and kept alongside the original.
- Automatic translation — when Automatic translation is enabled on the customer (Administration → customer settings), scenarios are translated into each recipient's language automatically.
- Each language is stored as its own template version, so you can review and fine-tune any translation.
- Attachments are translated too, so a localized scenario stays consistent from end to end.